Time for some customization

Tevenor

2021 Grandaddy Alum / 2022 Grandaddy AssCap
Albatross 2024 Club
Joined
Nov 17, 2019
Messages
12,555
Reaction score
30,128
Location
Upstate NY
Handicap
5ish
With Thanksgiving coming up next week and me taking some time off and the weather turning on me, I decided to do something I had been pondering most of the year: custom paint filling my Toulon Las Vegas. Love the putter and don't see me getting rid of it any time soon ( even with the Grandmama coming up ) so with the cold weather on me and free time, time to go play. Watching and reading up on the threads @Space Bandito and my buddy @xThor have out there for their work ( @Space Bandito is crazy good! ) gave me the inspiration and push to go give this a try.

Now for all due disclosure, I've done custom paint work in the auto world a bit so I am not a complete novice but I've never done it on a golf club. This could turn out fantastic or could be disasterous. Time will tell. :D

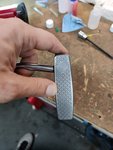
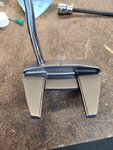
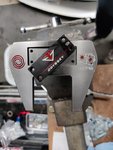
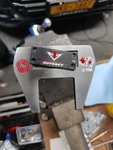
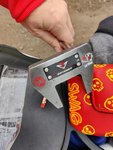
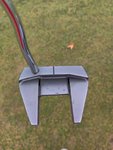
Either way I'll take pics along the way and see how it turns out. Below is how the putter looks today. Standard Las Vegas head with green swirls and green and white paint fill.
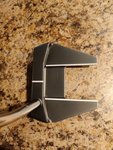
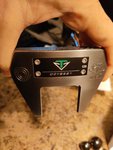
IMG_20201122_164357.jpgIMG_20201122_164346.jpgIMG_20201122_164333.jpg


The goal is to go a different direction, specifically paint filling the underside vegas sign and Ace/Jack cards logo along with teh swirl. Targeting something like this with a few custom changes. Red and black themed with white accent sections. Planning on filling the vegas sign/cards outline in white and then red for the Ace and star and black for the Jack. Swirl will be in red to match the face swirl. Still deciding what parts of the weight will be which color.
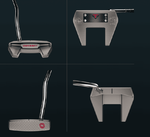

1606081698955.png


Should be a fun time, if nothing else will keep me busy over the Thanksgiving break. :D


Any tips/hints/suggestions from the THP community?
 
Can’t wait to see the finished product, like the idea of giving it “Vegas” colors to go with the putters name.
 
No tips or suggestions but looking forward to seeing how it turns out.
 
This will be nice to see the finished product.
 
Looking forward to seeing the final product!
 
I found when doing my Swag paint fill again here a couple weeks ago, that I had a bugger of a time cleaning it up afterwards (the overfill).

My advice? Use a very gentle hand when cleaning the excess. I would finally have stuff how I wanted it, let it dry, and then wiped...... and then would have to redo stuff (multiple times), to get it to a level of finish that I could accept lol.
 
Cool sounding project! look forward to seeing how it goes!!
 
Nice, good luck looking forward to seeing the finished paint fill
 
Nice, good luck looking forward to seeing the finished paint fill
 
Good luck! I jumped into to painting a few things earlier this year and have enjoyed it. What ever happens don't sweat it, remember you can always restripe the fill and start over!
 
Does the finished product get a free trip to it's namesake to celebrate?
 
Does the finished product get a free trip to it's namesake to celebrate?

No but hopefully gets a ride to Carlsbad, CA. Does that count? :)
 
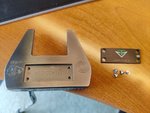
Deconstruction has started.

IMG_20201123_114303__01.jpg

Materials arrive today to get started.
 
Last edited:
Vegas is all about glitz and glamour. You should also do the face... like it's the lights around the casino marquee(y)

That's probably way too much though!

Looking forward to seeing the finished product
 
Quick update. I was able to get the stripping done last night. Green was easy. The white? Holy crap. Whatever process Callaway/ the Toulon guys used for the white was damn good. It would not give up. I think it took me 2 hours and a lot of soaking for it to get cleaned.

They left me with this.
IMG_20201124_230312.jpgIMG_20201124_230324.jpg

A little bit more clean up to get in the edges but for the most part, ready to paint.

I played around last night just to practice technique and get a sense of colors. I'll update a bit later with updates with colors.
 
Next update.

Had to change my color scheme around a bit. Black on the weight was to close to my paint color so decided to go red and white for the weight.

2nd issue. The red I am using is a clear red meaning it will pickup the color of the back ground and let it through. While on the tour grey of the body, this gives a nice deep effect similar to the dots on a Scotty, on the black of the weight it just looks dull. Solved that by putting a layer of white on first then red over top. Only concern now is if after a couple of coats, the hue doesn't match between the red on the weight and the red on the body. May have to paint the body with a white coat first as well to make them match.

Picture below is after one coat of the white and 1 coat of the red after a quick clean. Definitely not done and needs at least 2 more coats I think.
IMG_20201125_132917.jpg
 
Last edited:
Another update.

Ended up redoing the weight and starting over from scratch. I didn't like the way it was turning out and wanted to try something a bit different in the base layers. Also redid the Vegas sign section as it was getting to be a big pain trying to clean up all the tiny angles.

Some lessons so far.
  • Give the paint more time to dry between coats makes it easier to clean up before the next coat. I was giving it 1 hour between coats based on the recommended dry time of the paint but I found that if I doubled that to 2 hours, the paint in the fill area kept a cleaner finish to it when I did the wipe off of the excess.
  • Go the finest needle/applicator you can find. Yes it will take longer to fill with paint but you will have much less to wipe off and will save you time in the long run. Putting the paint down was the easy part.
  • Clear based paint of any color works best with an underlying counter color ( white, black, grey, etc. ) vs the body color of hte putter if the putter is dark. Depends on the look you are going for.

So far I am happy with the way it turned out. I took it out to play yesterday and see how it would hold up and it didn't have any scratches, leakage, etc. Quick wipe with the towel and it was fine. I am going to keep working on a couple of areas that I know I can get done a bit cleaner and have a sharper line ( vegas star for instance ) but for now, pretty happy with the way it turned out. Not done but for a first pass, happy with it.

PIcs below.

This was the last pass before the last cleanup. And before I decided to redo the weight. Just to messy for me but you could see how it was going to turn out.
IMG_20201126_191348.jpg


This was after the rework and clean up and out on course in the pseudo-grey/sunny sky. The red pops in the light outside of the garage. You can see the vegas star needs a little more work.
IMG_20201127_111504.jpg


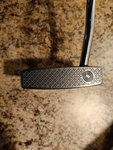
Went a different direction with the top. I used gloss black as the base coat for the alignment lines. Then added a coat of red clear over top. You can just barely see the result here at the tail end where its got a touch fo red hue. When you look straight down, its black and very contrasting with the body of the putter. When the light hits it however from an angle, it shines dark red and gives it a different feel. I'll try to get some pictures in the sunlight. The effect is pretty cool.

IMG_20201127_122535.jpg


I still have to clean up the odyssey text inside the back of the putter and redo some touch points on the sole. Also going to replace the swirl on the face with the same thing I did on the sole: white first coat with 2/3 red coats on top to give it that brighter red. Should have that done by the end of the weekend.
 
Last edited:
You did it fantastic job!
 
Back
Top