Woodworking / Furniture Building

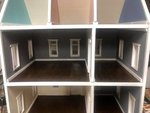
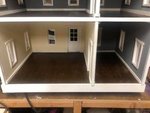
Been working on a dry bar cabinet. Was lax so I don’t have progress pics but here it is in its current state. It’s getting a drop front up top and sliding bypass doors on the bottom. Upper left will get some racks to hang stemmed glasses:

f72fccaba1fd19be6b12b228b42f7668.jpg

Very nice work!
 
Nice! When you say "drop front" does that mean the top cover panel will drop down to become a shelf?

Yes. If you look at the shelf supporting the drawer I have mortises for the hinges.
 
Woodworking / Furniture Building

66f67c64dd75eb7d5b019ac9a932898c.jpg


32773b5823b0a2770ae622b69616b287.jpg


It’s upside down but you can see the drop front in place.
 
Last edited:
e017ef219b347dca4de89c18a26828f5.jpg

33d55c2462750e24996d0cd01244ecb6.jpg

82acb0bc155fb632e0e697f8a1b20b36.jpg


More progress. Once I get finish on the inside I’ll get the back panel on and wrap this thing up.
 
I used some of the wood that JohnSinVA sent me to make this. It was made for my Uncle. I sent it to him last week as a gift for Vietnam Veterans Day. I cut and planed both pieces down to 1/4 inch and used the scroll saw to cut everything out. I've been doing a lot of scroll saw work lately.

1d6f5b7d6403bb5eb2fa2d0331be42da.jpg
 
I finally got around to restoring these hand planes that I have had for years. They are all made in the USA Stanley and Bailey Planes

8e55b0954c1f289e129e1420fb374576.jpg


2484fbdb9b2b8df17a396d038939aef5.jpg


912ccd20491a5b9fee1efec7e3111c3d.jpg


c9add237109ad105f172d8cd2f939248.jpg


Sent from my iPhone using Tapatalk

4, 4 1/2, 5 1/2, and 6?
 
Finish is on and it’s ready to go up for auction:
a2c317e3279ac63a5ade012a299ab74f.jpg

0efae6ec77a54683b480e44b52a9c038.jpg

9f3293e451e5b3649a2293a2dc5e1e95.jpg

4b49c2a696a5ff27579d8b6a39c485a8.jpg
 
so for the first time in about 10 years, I built a piece of furniture, it was fun! it is for the garage, it's a bit rough, but I like it, I might actually do some more now that I have some storage to clean some space
 
Here is a picture. The drawers were hard to fit since the floor is severely slanted and I wanted to keep it on wheels
63af46a7c8b461f0e28e999cbbaa9a0a.jpg


Sent from my SM-G960W using Tapatalk
 
That looks solid Martin! Well done!
 
so for the first time in about 10 years, I built a piece of furniture, it was fun! it is for the garage, it's a bit rough, but I like it, I might actually do some more now that I have some storage to clean some space

Nice work! Making stuff always feels good!
 
I just recently realized that it has been almost Six years since I finished my last rocking chair, so I figured it was time to do another one. I didn’t take any pictures of stock prep or layout, but everything is cut from 8/4 maple and a bit of walnut:
[IMG2=JSON]{"data-align":"none","data-size":"full","src":"https:\/\/uploads.tapatalk-cdn.com\/20190814\/97d20b6df4b18b6bb2feac83787d9882.jpg"}[/IMG2]
The back legs and crest rail. The crest rail is made by coopering smaller pieces together rather than cutting a curve out of thick stock. The front legs are currently just square billets right now. They will get cut to shape after they are sized to join the seat.
[IMG2=JSON]{"data-align":"none","data-size":"full","src":"https:\/\/uploads.tapatalk-cdn.com\/20190814\/c2f2459773002fa4d4ee3aa3cbd301ab.jpg"}[/IMG2]
The splats for the back begin life as for thin strips of wood. The walnut strip will face the back of the chair and provide some visual interest. The strips will get laminated using a form to provide the shape:
[IMG2=JSON]{"data-align":"none","data-size":"full","src":"https:\/\/uploads.tapatalk-cdn.com\/20190814\/d9c754a834698f27f8105cee8cd2138f.jpg"}[/IMG2]
Gluing up the laminations is sort of like making lasagna. Some sauce on the noodle:
[IMG2=JSON]{"data-align":"none","data-size":"full","src":"https:\/\/uploads.tapatalk-cdn.com\/20190814\/b1928e3e9d7158a0155c4d74e0146a0a.jpg"}[/IMG2]
Then add another noodle:
[IMG2=JSON]{"data-align":"none","data-size":"full","src":"https:\/\/uploads.tapatalk-cdn.com\/20190814\/cc01634e62bf5bcc54475a7b4ddf85d4.jpg"}[/IMG2]
Once the stack is together it goes into the form:
[IMG2=JSON]{"data-align":"none","data-size":"full","src":"https:\/\/uploads.tapatalk-cdn.com\/20190814\/438b7d1819c73f57bc791602487d09ec.jpg"}[/IMG2]
Then gets the daylights clamped out of it:
[IMG2=JSON]{"data-align":"none","data-size":"full","src":"https:\/\/uploads.tapatalk-cdn.com\/20190814\/f901377b61f109764b660d413977180c.jpg"}[/IMG2]
When everything dries and sets up, the splats will be ready for cleanup and final shaping:
[IMG2=JSON]{"data-align":"none","data-size":"full","src":"https:\/\/uploads.tapatalk-cdn.com\/20190814\/8daef8e65e8a5fb6f0baa0108e8622ad.jpg"}[/IMG2]
3 down, five to go
 
Last edited:
My last major project was a doll house I built with my daughter for my daughter for Chirstmas. It is a custom house, I took elements she wanted from 3 different houses and created my own unique house. Here are some Christmas morning pics:

house1.jpg
house1a.jpg

I am starting a coffee table for my mother this weekend.
 

Attachments

  • house3.jpg
    house3.jpg
    21.4 KB · Views: 2
  • house4.jpg
    house4.jpg
    23 KB · Views: 1
golfinnut;n7494608 said:
That's pretty damn good there buddy! Maybe you should just stick to that instead of golf ... you're much better at it! HA! :act-up:

Excellent work, love the walnut...
 
FreddieMac;n8876668 said:
I am starting a coffee table for my mother this weekend.

Did you get that coffee table underway?
 
Back
Top