Woodworking / Furniture Building

That's a good looking chest. What kind of hinges did you use for the top?

The planer cart looks really well thought-out. How does it perform when the chip bin starts to get full?
Thanks. The hinges are the torsion stay ones from rockler. They weren't cheap even though they were on sale... but a few extra bucks spent to prevent tiny smashed fingers and tears from my nephew are worth it to me.

The planer cart took a few tries to get the baffle working right but now it performs well regardless of how full the bin is. What I have to look out for is the screen getting clogged. So far so good though. If I notice any reduction in chip collection I stop to bang on the sides a bit (to knock dust down into the bin) and empty the bucket. About every three empties I scoop out the fines from the right side. Maybe in a high production shop this would get annoying but for me it has been great.
 
I guess I should make a contribution to keep this thread going:

temporary_zps3fadc693.jpg


A rocking chair in ash with purple heart accents.
 
I guess I should make a contribution to keep this thread going:

temporary_zps3fadc693.jpg


A rocking chair in ash with purple heart accents.

Nicely done. I'm a huge fan of the way ash really shows up with natural finishes.
 
I guess I should make a contribution to keep this thread going:

temporary_zps3fadc693.jpg


A rocking chair in ash with purple heart accents.
That looks great man. Really well done.
 
Threw this together at work over a few weekends left over cutoffs from a previous job not bad for $50.00..
410836078.jpg
410836079.jpg
 
Threw this together at work over a few weekends left over cutoffs from a previous job not bad for $50.00..
410836078.jpg
410836079.jpg


That's the best $50 I've seen spent in a while. I wish my cutoffs were that usable.
 
I guess I should make a contribution to keep this thread going:

temporary_zps3fadc693.jpg


A rocking chair in ash with purple heart accents.

Really impressive! Wish I could do something like this! That's like something out of Fine Woodworking! Well doen.
 
Threw this together at work over a few weekends left over cutoffs from a previous job not bad for $50.00..
410836078.jpg
410836079.jpg


Very nice! Nothing like saving money AND building something useful at the same time. I don't know if there's a better feeling than after I finish up making something myself.
 
Never going to lose or break another tee ..haha
411002338.jpg
411002339.jpg
 
Last edited:
Bookcase Build-along

Bookcase Build-along

Bumping this thread to the top to do a project build-along. Every year I build something for my wife to raffle as a fundraiser for her Relay for Life team. This year's project is this:

temporary_zps3d4c77f4.jpg


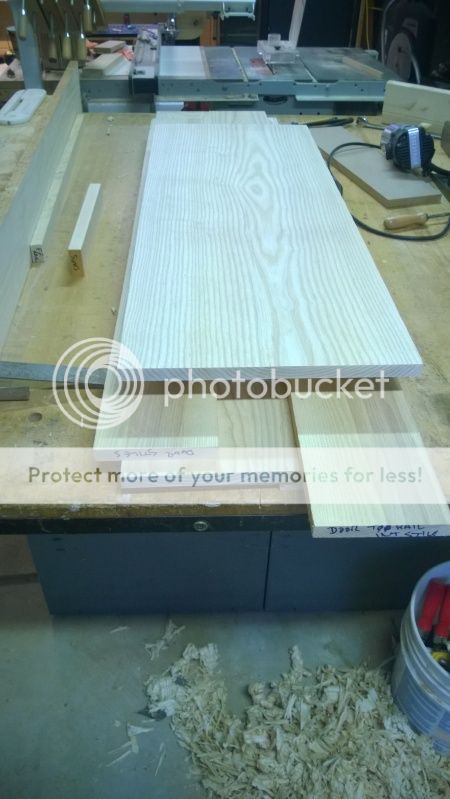
Being a project in the Craftsman style, one would normally use quartersawn white oak as the primary material. I'm a bit late getting started so I elected to use some white ash I had on hand. The plus is that it's been in the shop for a couple years now, so it's ready to go right away. Below I've got most of the boards I'll need for parts cut to rough length and four square:

temporary_zps8f3d73c5.jpg


Here I have the two sides ganged together to cut them to length. The triangle on the top piece is the layout triangle I used to layout the individual boards before gluing them:

temporary_zps3c1f9f18.jpg


The sides receive a curved cut out on the bottom and two through mortises which will pick up two bottom rails. The plans call for making a template to use to layout the curve and mortises and use as a pattern for routing the sides to final shape:

temporary_zps383212da.jpg


Here is one side after routing the mortises and cut out flush with the template:

temporary_zps18bb371f.jpg


The bottom rails receive an arch cut out. It is easier to cut and fit the tenons on the bottom rails before cutting the arch. Below I'm checking the thickness of the tenons:

temporary_zpse5fb1057.jpg


Here is a one tenon cut to final size and fit into its mortise:

temporary_zpsdfc7d6f5.jpg


The bottom shelf is housed in a dado and is supported by the bottom rails. This is a test fit of the sides with the bottom rails and bottom shelf in place:

temporary_zpsc18d59b4.jpg


The next steps will be to get the arches cut in the bottom rails, the face frame pieces cut and assembled, and the top cut to size. Once these tasks are done the parts can be sanded and assembled.
 
Looks like a nice project and quite a nice setup you have there...


Bumping this thread to the top to do a project build-along. Every year I build something for my wife to raffle as a fundraiser for her Relay for Life team. This year's project is this:

temporary_zps3d4c77f4.jpg


Being a project in the Craftsman style, one would normally use quartersawn white oak as the primary material. I'm a bit late getting started so I elected to use some white ash I had on hand. The plus is that it's been in the shop for a couple years now, so it's ready to go right away. Below I've got most of the boards I'll need for parts cut to rough length and four square:

temporary_zps8f3d73c5.jpg


Here I have the two sides ganged together to cut them to length. The triangle on the top piece is the layout triangle I used to layout the individual boards before gluing them:

temporary_zps3c1f9f18.jpg


The sides receive a curved cut out on the bottom and two through mortises which will pick up two bottom rails. The plans call for making a template to use to layout the curve and mortises and use as a pattern for routing the sides to final shape:

temporary_zps383212da.jpg


Here is one side after routing the mortises and cut out flush with the template:

temporary_zps18bb371f.jpg


The bottom rails receive an arch cut out. It is easier to cut and fit the tenons on the bottom rails before cutting the arch. Below I'm checking the thickness of the tenons:

temporary_zpse5fb1057.jpg


Here is a one tenon cut to final size and fit into its mortise:

temporary_zpsdfc7d6f5.jpg


The bottom shelf is housed in a dado and is supported by the bottom rails. This is a test fit of the sides with the bottom rails and bottom shelf in place:

temporary_zpsc18d59b4.jpg


The next steps will be to get the arches cut in the bottom rails, the face frame pieces cut and assembled, and the top cut to size. Once these tasks are done the parts can be sanded and assembled.
 
I little background I have been a cabinetmaker now for going on 30+ yrs. now have been working at the same shop now for 26 of them we do mostly high end millwork this is one of my fav. job's to date..

Packer-Locker-Room.jpg


411002346.jpg
 
I little background I have been a cabinetmaker now for going on 30+ yrs. now have been working at the same shop now for 26 of them we do mostly high end millwork this is one of my fav. job's to date..

411002346.jpg

Those aren't just any old lockers. Did you have to make provisions for things like fans to dry the shoulder pads and recordings in the pockets for phone chargers?
 
No pretty much just storage for there personal items etc. Also did all the luxury boxes millwork

Those aren't just any old lockers. Did you have to make provisions for things like fans to dry the shoulder pads and recordings in the pockets for phone chargers?
 
Not my woodworking but some pictures of a dining room set my grandfather built for my Wife and I that we just took delivery of this morning. The full story is in the happy thread. These pieces will mean the world to me for years to come.


CvKJ7b.jpg


4MCQca.jpg


4suNiJ.jpg


7oRdX8.jpg


xRss4V.jpg


7uxqmG.jpg


sYtaie.jpg

CRdrWs.jpg

cSP576.jpg


nixSJc.jpg


5m5cET.jpg


HqtTfK.jpg
 
Those are gorgeous! It's funny, I used to only like modern things, but the older I get the more I appreciate real word work and the more traditional things.

I so badly want to find an old table and refurbish it for a room in our house. I have absolutely NO idea what I am doing. No skills, no equipment, no idea what to do, but I really want to do it.
 
Those pieces are beautiful dude I love the mission/craftsman styling both are purely simple elegance to me.
 
As my wife and I were going through everything we found a few more surprises. The inside of the hutch has a laser engraved photo of us and also had a bunch of bowls that he made out of the extra wood .

574f46b2a3796db09ce16bf17118aac1.jpg


e43a7c96c6ee50df3be99c91f0e07c40.jpg


6ec69b6118ee73e6d1b607c515bc285c.jpg


Sent from my iPhone using Tapatalk
 
awesome Ron
 
Finally finished the table I've been building. It's not perfect but it was a good learning experience.
814afde7c48ed5a37768c4c44379a549.jpg

f1d1de0f8b6ff2df4a9dd45ef2d6738a.jpg
 
Thanks!
 
That's a good looking table. Like golf, woodworking requires the ability to recover from the mistakes we make.
 
Ellis Bookcase, continued

Ellis Bookcase, continued

I expect it's time to post another update since it's been a while. Between kids practices, work, and squeezing in some swings I managed to get some more work done (but neglected to sweep the floor :embarrassed:):

WP_20150327_004_zps3szvbavj.jpg


The bottom rails have had the arches cut and sanded, the sides have been drilled for shelf pins, the top is cut to size, the face frame and back panel frames have been fabricated and the back panels are underway.

temporary_zpstwg9rurv.jpg


The original plan called for a mortise and tenon joint between the members of the face frames. I elected to use pocket screws since they are faster and won't be seen anyway.

temporary_zps662qwees.jpg


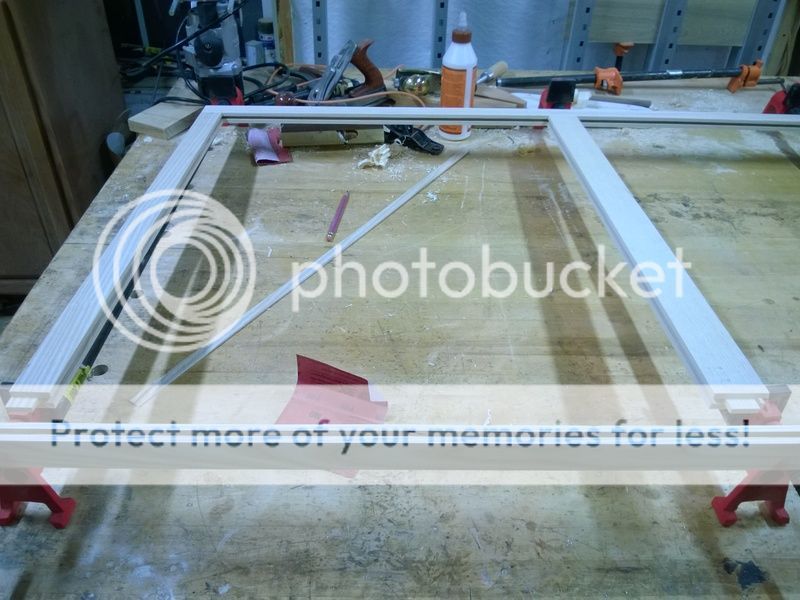
The back panel frame is groove and stub tenon construction. All members get a 1/4" groove to capture the back panels, the rails have short tenons to fit into the grooves of the stiles. The frame members will be glued together while the panels are just slipped into the grooves dry.

temporary_zpsiulaqcu8.jpg


These are the back panels being fabricated. They are 1/4" thick pieces edge glued together, and will slip into the back panel frame. The panels will be less than the depth of the grooves to allow for seasonal wood movement.

temporary_zpsodf0s6ml.jpg


The case sides and bottom are rabbeted to capture the back panel frame. The face frame will be glued directly to the sides.

The next steps will be to finish the back panels and complete the assembly of the back panel frame, sand the case pieces and assemble them, glue the face frame and back panel into place, and begin work on the door and shelves.
 
Back
Top